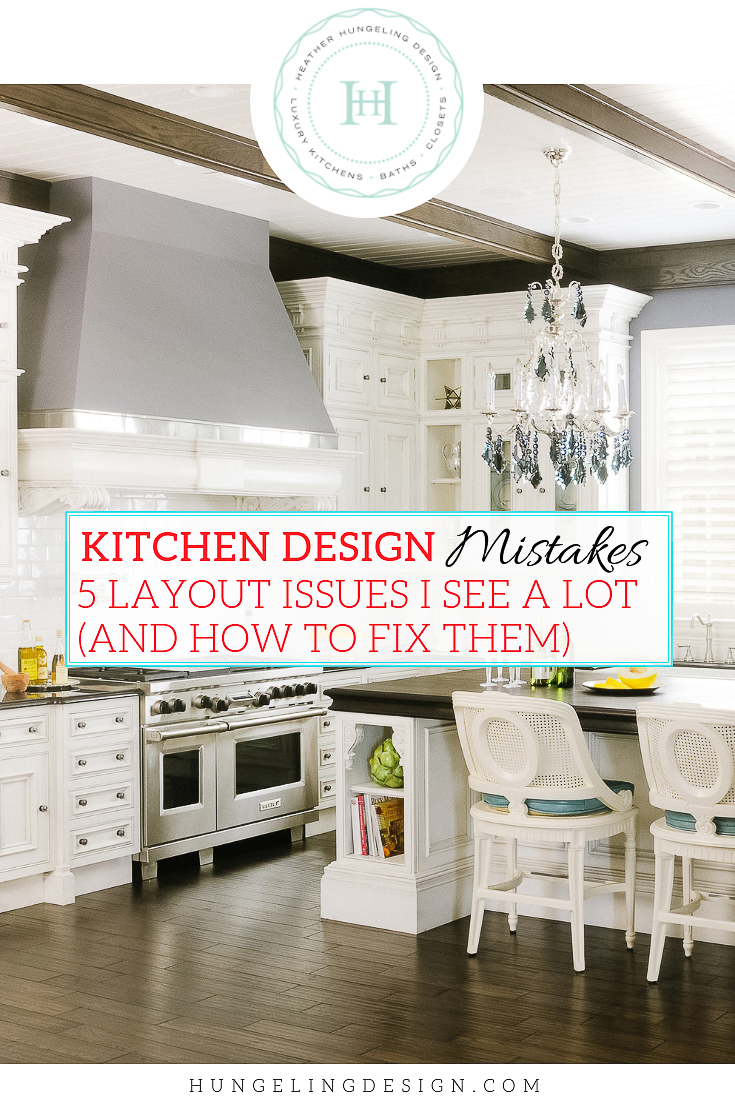
What I Would Change About Your Kitchen Layout
KITCHEN DESIGN MISTAKES: PART 1
Before becoming an independent kitchen designer, I cut my teeth in this business by working in a showroom that sold very high-end custom cabinetry. I have countless memories of clients walking into our showroom with their architectural blueprints in hand and a firm assumption that what they saw on those drawings was pretty close to their final design.
While they may have expected to make some minor changes, for the most part, I believe that people had the expectation that they were in our store to source the cabinetry and make some aesthetic choices - not change the kitchen layout. I also have countless memories of how that turned out to be wholly inaccurate!
Interestingly, most of these changes to the kitchen layout were made right out of the gate, at the very first meeting! After reviewing their initial plan, asking a series of questions about their lifestyle/needs, I would then proceed to suggest some fairly significant changes. More often than not, it was these initial recommendations that earned me the job and the client’s confidence.
In this week’s post, I’m sharing with you the advice that I found myself doling out most often about the layout and configuration of a kitchen.
Top Kitchen Layout Changes
1. JUST SAY “NO” TO THE COOKTOP IN THE ISLAND
Only one time in my professional career have I ever done a cooktop on the island, although 30% of my clients have started the process thinking that’s what they wanted. Unless you are a celebrity chef who plans on filming a cooking show in your home kitchen (which was the case the one time that I specified a cooktop in the island), then you probably won’t like that.
Most people will tell me that they asked the architect to place the cooktop in the island so that they could face the family room while they were cooking, but the reality is that you spend far more time doing prep and standing over your sink than you do standing at your cooktop. When you’re cooking, you stir something for a moment, then turn away and do other tasks while the food is cooking - only intermittently coming back to the cooktop to tend to your meal.
If you can arrange your prep space and your sink (either your main sink or a generous prep sink) in your island instead, you’ll spend far more time interacting with your family while preparing dinner. After mulling that over for a few minutes, people almost always agree. If that doesn’t convince someone then consider these additional reasons:
Pop up exhaust systems behind the cooktop have come a long ways, but they are still not as effective as overhead ventilation.
Ceiling mounted island hoods feel oppressive (and usually look quite dreadful).
Ceiling mounted island hoods often block the view.
Ceiling mounted island hoods get even trickier to work with if you have a particularly high ceiling or a low one.
2. GO EASY ON THE BAR STOOLS
If your architect has only developed a skeletal floor plan for you for the purpose of space planning, then you may not realize that you don’t have enough room for all those bar stools that you wanted until you finally sit down with a kitchen designer.
Those sketched out floor plans never show design details or features that clients will probably want when they are purchasing a high-end kitchen. When I create an island, there is usually a substantial design element at each end. It might be a leg of some sort, or it could be cabinetry oriented perpendicularly with chopping blocks, etc. An overhang that runs the length of the island with no other design feature to visually support the top looks mighty cheap.
So chances are, by the time we add some style and detail to your island, there won’t be room for quite as many stools as shown on your architect’s drawing. The frustration that ensues is why there are usually more revisions to the island than any other element of the kitchen design.
I’ve had clients dead set on trying to get 7-8 stools around an 8’ island (even though there was a breakfast table right next to the island). In those instances, I’ll attempt to elongate the island (if space allows) or try to wrap some of the seating around on a perpendicular side. The latter usually requires that the island be made wider than normal, which is often unsightly.
Unless your space is big enough that I can elongate the footprint of the island, you should reconsider if you really need that many stools. I also think it’s unnatural and uncomfortable to have multiple people all sitting in one long row. It does not contribute to good conversation.
I usually suggest limiting it to 3-4 stools if the seating is all on one side of the island. Bottom line…don’t try to turn your island into a 36” high dining table. You’ve already got a dining table or a breakfast table!
3. TWO ISLANDS ARE OFTEN BETTER THAN ONE
By over-sized, I mean both extra long and extra wide, although it’s the width that bothers me more than the length. This is particularly a problem with U-shaped kitchens that have awkward proportions. Somewhere out there, a kitchen designer decided it was a great idea to just fill the space in the middle of the room with a gigantic square island.
More often than not, I can re-work these layouts to accommodate two separate islands of more useful proportions. I’ve written a whole post about Designing an Island for a Large Kitchen where I go into a lot of the pros/cons about having a large, square island. Not only are these islands unsightly, but there are definitely a few major disadvantages to having an aircraft hangar in the middle of your kitchen.
You won’t be able to source a natural stone slab large enough (creating the need for seamed material).
You won’t be able to reach to the middle of it.
They are obstructive to the flow of your kitchen.
Most of my islands tend to have a width of 48-50”. Occasionally, I’ll creep up to 52”, but that’s about as wide as I’ll go.
4. DON’T UNDERESTIMATE THE BEAUTY OF A FREESTANDING RANGE
You all might get a bit testy with me on this one, but this is my opinion. I hate trading out the look of a beautiful range for a cooktop or a rangetop. I think a freestanding range is so much prettier and more visually impactful - especially when you’re trying to make the range area one of your big focal points! I don’t think a cooktop is unsightly at all…I simply see it as a missed opportunity.
Personally, if space allowed, I would choose a 60” range that offered two full-size ovens below so that I wouldn’t have to design around a tall, ugly oven housing.
If you’re still leaning towards two wall ovens, then keep in mind that this can cause certain layout problems for some folks. Presumably, you’re going to want a high-end microwave/speed oven and warming drawer to go along with those wall ovens. However, all four of those appliances will not fit in a single tall oven unit. So now you need to introduce another tall unit or scatter some of the appliances throughout the kitchen. That might be fine for some and be problematic for others - it all depends on the kitchen size and design. At best, it tends to dictate a lot of the design decisions.
If you’re with me on part of this, but you just don’t want to have to bend over for your oven, then consider this idea:
Select a 48” range (bigger is fine too), which will provide you with one regular oven, plus a small side oven. Then choose a single wall oven, which can be housed along with a high-end microwave and a warming drawer in a single, tall cabinet. This will give you a wall oven you can use as your main oven, plus the benefit of not one, but two extra ovens when needed. I’ve found this to be a very successful combination.
5. DITCH THE HARD RULES OF THE WORK TRIANGLE
We’ve all seen these kitchens. You know, the ones where the homeowner was a slave to the concept of the work triangle, so all of the hardworking elements are crammed into one section of the kitchen without any regard for good flow or aesthetics. It’s like some kitchen designer’s entire education consisted of reading one article on space planning from, well…like 1980.
We’ve come a long ways since then and so has the “work triangle.” I won’t say it’s dead, because you can have a nice little triangle between your range, sink and refrigerator in a smaller kitchen. That may still work for a lot of people! However, with a larger, luxury kitchen, you need to switch over to thinking about “work zones” instead of the triangle.
If you try to cluster the three major items into one corner of your kitchen, the rest of your kitchen feel completely pointless. Why bother dreaming about having a large kitchen when you’re going to sentence yourself to only using a 1/3 of it. A good-sized prep sink and a few refrigerator (and freezer) drawers will work wonders in bridging the distances in a large kitchen. For instance, if your refrigerator was too far away from the range, you might consider setting up several refrigerator drawers (for produce, milk, eggs, etc.) close to the range, along with a prep sink.
The point is, this is a highly customized approach to kitchen design and one which requires an experienced designer to make individualized suggestions upon learning more about you!
I hope this post helped you to think through a few big layout decisions for your kitchen. Another kitchen designer may have a completely different take, but I think it’s always helpful to hear another perspective.
Stay tuned for the next post, where I’ll let you know about some of the mistakes that I see other people make a lot in regards to the design and sizing of their cabinetry! In the meantime, don’t forget to check out my Luxury Resource Library, which will also subscribe you to my future blog posts.